What Is Point Shooting? Techniques, Tips, and Training
- Mo-Su 10.00 – 20.00
- +372 555 85 416
- sale@laskmine.ee





Trigger control is defined as the smooth, consistent manipulation of a firearm’s trigger without disturbing your sight alignment. It is the single most important mechanical skill separating accurate shooters from inconsistent ones. The best practices for trigger control in shooting combine correct finger placement, calibrated grip strength, continuous trigger tension, and disciplined follow-through. Industry standards recommend placing the center of the first finger pad on the trigger face and maintaining follow-through for 0.5 to 1 second after the shot breaks. Competitive shooters who master these fundamentals see measurable improvements in shot grouping and overall performance.
Finger placement is the foundation of every accurate shot. The center of the first finger pad, not the fingertip or the first joint, belongs on the trigger face. This position delivers the most tactile feedback and keeps lateral pressure off the trigger, which is the primary cause of shots pulling left or right.
Using the fingertip creates a lever effect that pushes the muzzle sideways as the trigger moves rearward. Using the joint reduces sensitivity and makes it harder to feel the trigger’s break point. The pad placement keeps your press moving straight to the rear, which is exactly what consistent accuracy requires.
Pro Tip: Try the middle finger drill: place your middle finger on the trigger for a few dry-fire repetitions. Because the middle finger aligns more directly with your hand’s major tendons, it reveals grip alignment flaws that your index finger can mask.
Assessing your finger placement takes less than 30 seconds before a session. That 30 seconds prevents hours of chasing shot errors that have nothing to do with your aim.
Grip strength is not about squeezing as hard as possible. The recommended grip pressure sits at approximately 60–70% of your maximum hand strength. That range stabilizes the firearm against recoil without creating the hand tremors that excessive tension produces.
White-knuckling the grip is one of the most common errors among shooters who are trying to improve accuracy. The irony is that gripping too hard introduces the very instability they are trying to eliminate. Tremors from over-tension show up as erratic shot groups even when sight alignment looks perfect.
Pro Tip: Grip consistency matters more than grip strength. A grip that changes between shots produces inconsistent results even with perfect finger placement. Train your hands to lock in at the same pressure every time.
The relationship between grip and trigger pull is direct. A stable, consistent grip lets the trigger finger move independently without the rest of the hand compensating. That independence is what produces a clean, straight-to-the-rear press.
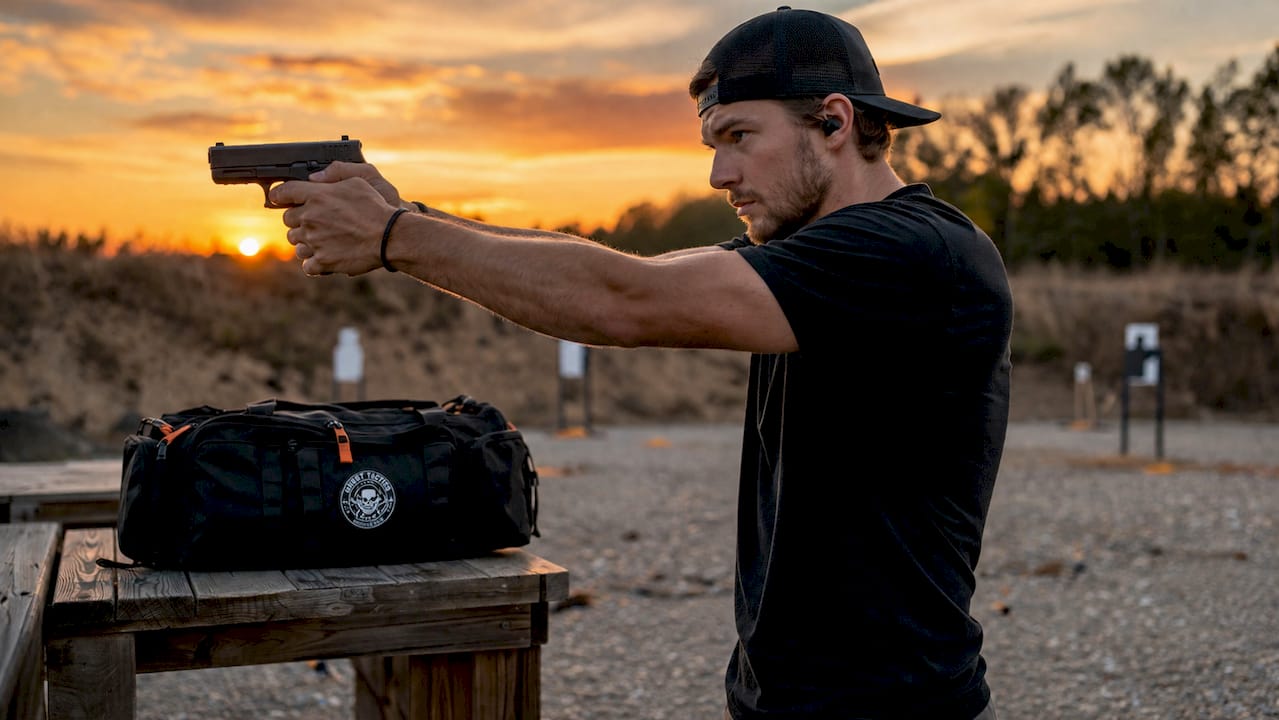
Trigger control works best as a continuous process, not as a series of separate actions. Keeping partial tension on the trigger between shots reduces the total movement your finger makes and cuts the window for anticipation to develop.
Anticipation is the shooter’s reflex to brace for recoil before the shot breaks. It shows up as a flinch, a push, or a dip of the muzzle. The longer your finger lifts off the trigger between shots, the more time your nervous system has to anticipate the next firing event.
Minimizing reset movement also improves shot rhythm. Shooters who practice continuous tension report tighter groups during rapid-fire strings because each shot starts from the same mechanical position.
Follow-through is defined as maintaining your shooting posture, grip, and sight alignment for 0.5 to 1 second after the shot fires. This is not optional. It is the mechanism that confirms your technique held through the moment of ignition.
Most shooters relax their grip or shift their eyes to the target the instant they hear the shot. That reflex breaks the mechanical chain before the bullet has left the barrel. The firearm is still moving during the firing cycle, and any change in grip or posture during that window affects the shot.
Pro Tip: After each shot, call your shot before looking at the target. Identify where your sights were at the moment of the break. If your call matches the hole in the target, your follow-through timing is correct. If they do not match, your grip or posture broke early.
| Follow-through element | Correct execution | Common mistake |
|---|---|---|
| Grip pressure | Maintained through full 0.5–1.0 second window | Released at the sound of the shot |
| Sight alignment | Eyes stay on front sight post-shot | Eyes shift to target immediately |
| Trigger finger | Held at rear until reset begins | Released instantly after firing |
| Body posture | Stable stance held through recoil | Shooter leans back or shifts weight |
Follow-through also reinforces muscle memory. Every repetition where you hold your position correctly trains your body to treat that posture as the default. Over time, the correct behavior becomes automatic rather than deliberate.
Daily dry-fire practice of 10–15 minutes focused on eliminating shot anticipation is the most cost-effective training method available. It builds the muscle memory for a clean trigger press without the noise, recoil, and expense of live ammunition.
The key word is deliberate. Mindless repetition reinforces bad habits as effectively as good ones. Every dry-fire repetition should have a specific focus: finger placement, grip pressure, trigger press direction, or follow-through.
Incorporating beginner pistol drills into your dry-fire routine gives structure to sessions that might otherwise drift into unfocused repetition. Structure is what turns practice time into skill development.
The blank wall technique deserves extra attention. When you stare at a target, your brain calculates whether the shot will hit before you fire. That calculation triggers the anticipation flinch. A blank wall removes the calculation entirely, forcing your nervous system to focus on mechanics instead of outcome.
Triggers are mechanical devices subject to wear, and inconsistency in trigger feel is often a maintenance issue rather than a technique problem. Shooters who practice regularly but ignore trigger condition often plateau because the mechanical input keeps changing under their finger.
Familiarize yourself with your trigger’s weight, travel distance, and reset characteristics. Any change in these qualities signals wear or a need for adjustment. A trigger that felt crisp six months ago may have developed creep or a heavier break without the shooter noticing gradually.
Run a simple check before each range session: press the trigger slowly and feel for grit, stacking, or inconsistency in the break. If the feel has changed from your baseline, address the mechanical issue before attributing shot problems to technique. Understanding your specific firearm’s trigger, whether it is a precision rifle or a service pistol, makes technique adjustments far more targeted.
Shooting stance is not separate from trigger control. It is the platform that makes consistent trigger mechanics possible. A stance that shifts between shots forces compensations in grip and trigger press that undermine every other technique you practice.
The two most effective stances for handgun shooting are the Weaver and the Isosceles. The Isosceles stance, with both arms extended and shoulders square to the target, distributes recoil evenly and keeps the trigger hand in a neutral position. The Weaver stance uses a push-pull tension between the hands that some shooters find helps them maintain grip pressure. Neither is universally superior. The correct stance is the one you can hold consistently under pressure.
Body posture affects shot grouping directly. Shooters who lean back or lock their knees absorb recoil poorly, which disrupts grip pressure and trigger reset timing. A slight forward lean, bent knees, and weight on the balls of your feet create a stable base that lets your trigger hand do its job without the rest of your body interfering.
Consistent trigger control requires correct finger placement, calibrated grip pressure, continuous tension through reset, and disciplined follow-through held for 0.5 to 1 second after every shot.
| Point | Details |
|---|---|
| Finger pad placement | Use the center of the first finger pad on the trigger to prevent lateral pressure and shot deviation. |
| Grip at 60–70% strength | Gripping at 60–70% of maximum capacity stabilizes the firearm without causing hand tremors. |
| Continuous trigger tension | Keep partial tension through reset to reduce anticipation and improve shot rhythm. |
| Follow-through duration | Hold posture and sight alignment for 0.5–1.0 second after the shot to confirm technique held. |
| Daily dry-fire practice | Ten to fifteen minutes of deliberate dry-fire daily builds muscle memory faster than occasional live fire. |
Most shooters treat speed and precision as opposites. They practice slow and careful, then wonder why their technique falls apart when they need to shoot fast. That is the wrong mental model.
Speed is a stress test. When I watch shooters press the trigger aggressively during drills, grip flaws that were invisible at slow speed become obvious immediately. The gun torques, the groups open up, and the shooter finally sees what their technique actually looks like under real conditions. Slow, careful practice feels productive, but it can hide problems for months.
The shooters I have seen improve fastest are the ones who alternate between slow deliberate reps and fast aggressive ones. The slow reps build the correct pattern. The fast reps expose whether the pattern is actually embedded or just performed when there is time to think about it.
One thing I would add that most articles skip: learn your trigger mechanically, not just by feel. Know the weight, the travel, the reset distance. When you understand the mechanism, you stop fighting it and start working with it. That shift in mindset, from reacting to the trigger to controlling it, is where real consistency begins.
Maintain a relaxed body. Tension in your shoulders and jaw travels down your arms and into your grip. The grip should be firm and deliberate. Everything above the wrists should be as relaxed as you can manage. That combination sounds contradictory until you practice it, and then it becomes the only way that makes sense.
— Tõnis
Reading about technique builds understanding. Applying it under real conditions builds skill. Laskmine offers range sessions designed for shooters who want to work on specific fundamentals, including trigger control, grip consistency, and follow-through, with access to the equipment and space needed to practice correctly.

The Tondi Shooting Range provides a structured environment where you can run dry-fire and live-fire drills back to back, test your grip under speed, and get feedback on your shot placement in real time. Whether you are refining technique for competition or building fundamentals from scratch, professional instruction at a dedicated facility accelerates progress that solo practice cannot match. Book a session at Laskmine and find out exactly where your trigger control stands.
Place the center of your first finger pad on the trigger face, not the fingertip or the joint. This position delivers maximum tactile feedback and keeps lateral pressure off the trigger, preventing shot deviation.
Grip the firearm at approximately 60–70% of your maximum hand strength. This range stabilizes the gun against recoil while preventing the hand tremors that excessive grip tension causes.
Maintain your posture, grip, and sight alignment for 0.5 to 1 second after the shot fires. Releasing grip or shifting your eyes before that window closes can affect bullet path and breaks muscle memory.
Daily dry-fire sessions of 10–15 minutes build the muscle memory for a clean trigger press without live ammunition. Focusing on a blank wall during these sessions removes target pressure and reduces anticipation flinch.
Fast shooting exposes grip inconsistencies that slow practice hides. Aggressive trigger presses act as a stress test. Alternating between slow deliberate reps and fast aggressive ones is the most effective way to build technique that holds under speed.