Tondi Shooting Range is Open!
- Mo-Su 10.00 – 20.00
- +372 555 85 416
- sale@laskmine.ee





Clean a firearm by first confirming it’s unloaded with both a visual and physical check, then work through one condensed routine: field-strip per the manual, scrub the bore breech to muzzle, wipe down the action and contact surfaces, add a light coat of oil, and finish with a full function check before it goes back in the safe. Skip a step and you risk anything from a sluggish trigger to a jam at the range.
TL;DR:
- Properly cleaning a firearm requires a thorough visual and physical check to confirm it is unloaded before disassembly.
- Using the correct tools, such as bore brushes, patches, and appropriate solvents, is essential for effective maintenance, especially for different firearm types.
- Focus on cleaning and lubricating contact surfaces like the slide rails and breech face, as neglecting these can impair reliability more than a dirty bore.
- Always push patches from breech to muzzle and avoid over-lubricating, since oil pooling attracts debris and causes malfunctions.
- Cleaning frequency depends on usage, with heavy shooting sessions demanding full cleaning and long-term storage requiring annual deep maintenance.
Every cleaning session starts the same way, regardless of whether you’re working on a carry pistol or a hunting rifle. Follow a four-point clearing sequence: remove the magazine, lock the action open, visually inspect the chamber, then physically sweep it with a finger or tool to confirm it’s empty. Skipping the physical sweep is a common cause of mistaken assumptions about firearm status, which can lead to incidents.
Once you’ve cleared the firearm, set the ammunition in a different room. Not a different drawer, a different room. It sounds excessive until you remember that mixing live rounds and cleaning supplies on the same bench is exactly how mistakes happen.
From there:
A basic firearm maintenance guide only works if you have the right gun cleaning supplies on hand. You don’t need a workbench full of gear, but a few specific items matter more than people expect.
At minimum, assemble:
A basic starter kit handles routine maintenance for most owners. Vendors like Otis and Hoppe’s sell complete kits that cover pistols, rifles, and shotguns in one case, which is enough for anyone cleaning after a normal range day.
Pro Tip: If you shoot suppressed or put hundreds of rounds through a gun in a session, invest in a dedicated cleaning vise. It holds the firearm steady and takes the guesswork out of keeping the rod centered in the bore, which matters more than most new owners realize.
This is the core routine. It works for the vast majority of pistols, rifles, and shotguns with only minor adjustments by platform, which are covered further down.
Rushing step five is the single most common reason a “cleaned” gun still runs rough. The bore gets all the attention while the extractor and breech face, the parts that actually control feeding and ejection, get ignored.
The universal routine above covers 90% of the work, but each platform has a spot where people cut corners or cause damage without realizing it.
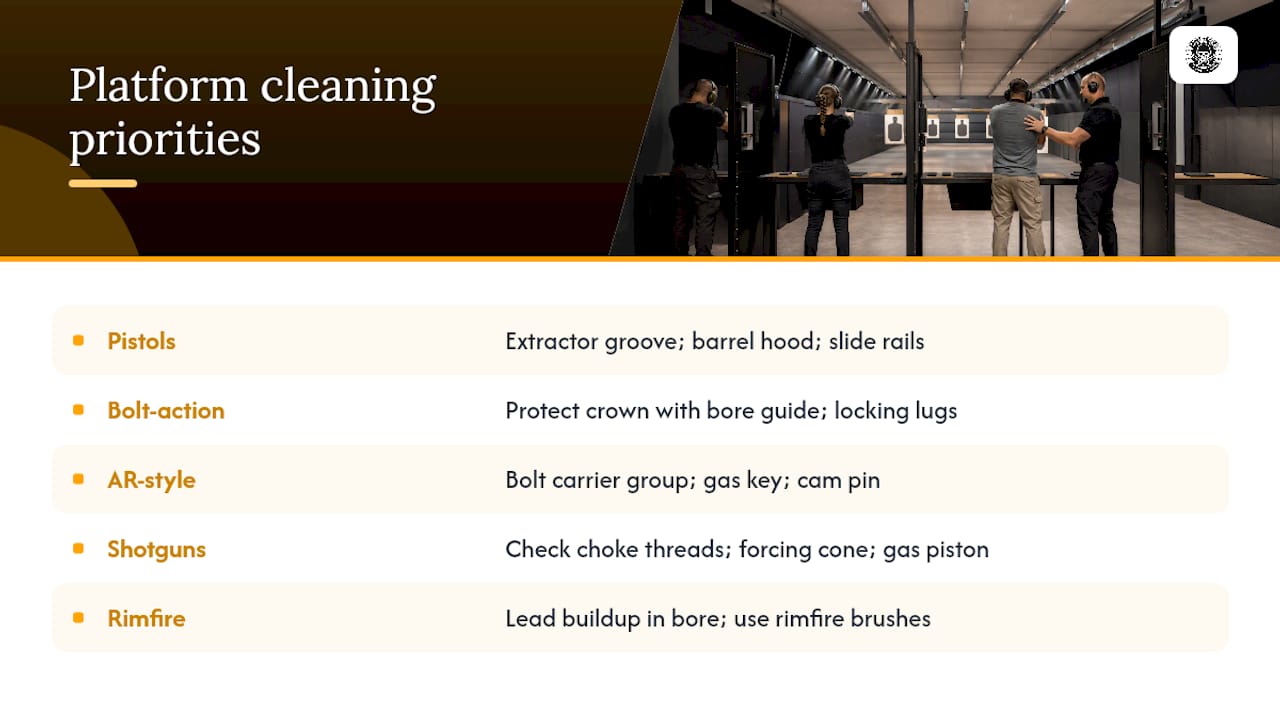
Pistols: Pay close attention to the extractor groove, the barrel hood, and the slide rails, since fouling builds fastest there. Some striker-fired models require a safe striker release step before disassembly. Check your manual first.
Bolt-action rifles: Protect the crown with a bore guide every time you clean. It’s the single most damage-prone spot on the barrel. Clean the locking lugs and bolt face carefully. Carbon buildup there is a common cause of stiff bolt cycling.
AR-style rifles: The bolt carrier group, gas key, and cam pin need direct attention beyond a basic bore pass. Carbon builds up fast in the gas system, especially with certain ammunition types.
Shotguns: Check choke threads for grit before reinstalling. On semi-autos, clean the forcing cone and gas piston system, both common trouble spots after a heavy day at the trap range.
Rimfire firearms: Lead buildup in the bore happens faster than with centerfire cartridges, so plan on more frequent attention. Use rimfire-specific brushes and solvents rather than reaching for whatever’s on the bench.
Most reliability complaints trace back to one of a handful of avoidable habits.
Pro Tip: If a function check reveals stiff or gritty movement that wasn’t there before cleaning, stop. That’s usually a sign a part went back in slightly wrong, not that the gun needs more lubricant.
Cleaning frequency isn’t one-size-fits-all, and treating every gun the same way wastes time on some and neglects others.
New firearms deserve a first clean before they ever fire a round. Factory preservative grease is thick, and removing it properly can take 45 to 60 minutes the first time. If a gun has sat loaded and unattended for years, or shows rust past the surface, that’s a job for a professional armorer rather than a home cleaning kit.
Reading a maintenance guide gets you most of the way there. Watching someone actually field-strip a slide or seat a bolt gets you the rest. A supervised, hands-on lesson dramatically cuts down on the errors that trip up new owners: lost springs, parts reassembled backward, over-lubricated actions.
Sessions are led by professional instructors and built around exactly this kind of hands-on learning. No prior experience is required, and every part of the routine, from handling to cleaning, is walked through step by step. If you want to build good habits from day one instead of guessing your way through a manual, the dry fire practice guide is a solid companion once you leave the range.
Used cleaning patches and swabs are soaked in solvent and carry lead and copper residue from the bore. Let them air-dry fully on a disposable surface, like a paper towel or cardboard, before throwing them in household trash. Wet patches sealed in a bag can build up solvent fumes, so give them time to dry first.
Don’t dump leftover solvent down a sink or storm drain. Many gun cleaning solvents contain petroleum distillates that local wastewater systems aren’t built to filter, and they can contaminate groundwater. Small amounts of fully used, non-hazardous solvent residue on a rag can typically go in regular trash once dry, but larger quantities of unused or bulk solvent belong at a household hazardous waste collection site. Most municipalities run these periodically. A quick search for your city’s hazardous waste program will tell you when the next one is.
Keep a dedicated small container, an old coffee can works fine, for solvent-soaked patches while you’re actively cleaning. That way nothing lands directly in a regular trash can while still wet, and you’re not tracking oily residue across your workspace. Wash your hands thoroughly with soap and water when you’re done, since lead residue exposure from cleaning is a real, if often overlooked, concern.
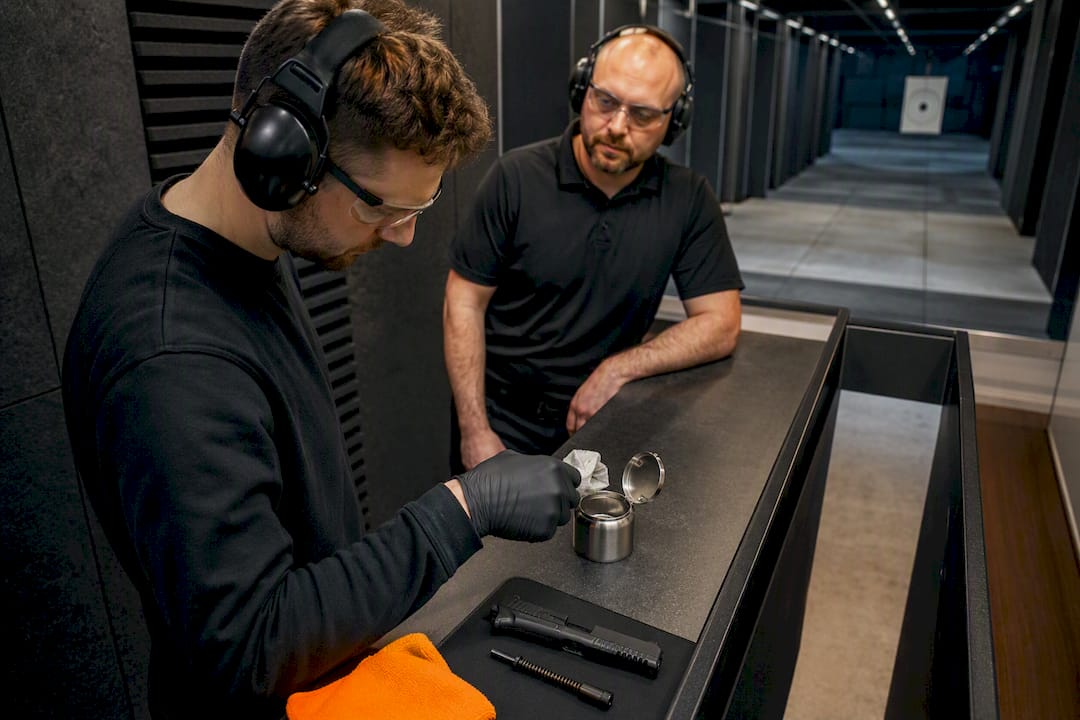
Yes, and it matters more than most cleaning guides mention. Gun cleaning solvents release fumes, and the fine lead particulate that comes off a fired barrel doesn’t just disappear once you wipe it down.
Clean in a room with an open window or a running fan whenever possible. A garage with the door cracked, a room with cross ventilation, or a covered porch all work better than a closed bathroom or a sealed basement corner. If you’re cleaning indoors with no airflow, fumes from nitro solvents can build up faster than you’d expect, leading to headaches or irritation with extended exposure.
Lead dust exposure from firearm cleaning is a documented but under-discussed health risk, especially for anyone who cleans guns regularly or does it as part of a job. Wearing nitrile gloves during cleaning cuts direct skin contact, and washing your hands and forearms with cold water and soap afterward, rather than hot water which opens pores, reduces absorption.
If you clean firearms often, consider designating one spot as your permanent cleaning station rather than rotating between the kitchen table and the garage. A consistent, ventilated setup means you’re not introducing solvent residue to surfaces where you eat or where kids and pets spend time. Wipe down the bench itself when you’re done, not just the gun.
A gun that ran fine before cleaning and jams afterward almost always points to something in the reassembly, not a sudden mechanical failure. Work through it in order rather than guessing.
First, reopen the action and visually confirm every part is present and seated the way the manual shows. A trapped cleaning patch left in the bore or chamber is one of the most common causes of a failure to feed, and it’s an easy one to miss on a quick glance.
Second, check for over-lubrication. If oil is visible pooling on the bolt face, slide rails, or trigger group, wipe it back with a dry patch. Excess oil collects dust and debris that can cause a sluggish or short cycle.
Third, verify springs are seated correctly, particularly the recoil spring on a pistol or the extractor spring on a rifle. A spring installed slightly off its guide rod is enough to cause erratic cycling without being visually obvious.
Fourth, run a slow, manual cycle of the action by hand before ever chambering a round again. Feel for grinding, binding, or resistance that wasn’t there before. Smooth manual cycling with no live ammunition is your green light to test-fire.
If the malfunction persists after checking all four points, stop and take it to a qualified gunsmith. Forcing a gun that won’t cycle correctly risks damaging parts or, worse, creating an unsafe condition. This is also exactly the kind of scenario where supervised, hands-on instruction prevents the problem in the first place, since an instructor catches a misaligned part before it ever leaves the bench.
Reading about the process only goes so far. You can learn under the direction of a professional instructor, on an indoor range, with no prior experience required. Every session includes a full safety briefing and walks you through firearm handling and basic maintenance hands-on, so the steps in this guide stop being theory and become muscle memory.
Sessions are structured around a wide selection of firearms and supervised instruction from start to finish. If you’re organizing something for a group, the gift card options make it easy to book a session as a present, and the range and owner packages cover everything from a single visit to recurring range access for gun owners who want a place to practice and maintain their own equipment.
Ready to see the difference between reading about a function check and actually running one under supervision? Book a session at Tondi Shooting Range and get hands-on with the exact routine covered in this guide.
For deeper detail beyond this guide, the Mississippi State Extension’s maintenance publication covers model-specific disassembly cautions, while Survipedia’s armorer guide walks through clearing sequences in more depth.
Always confirm the firearm is unloaded before anything else. Remove the magazine, lock the action open, visually inspect the chamber, then physically sweep it to be certain it’s empty.
No. WD-40 isn’t formulated as a firearm solvent or lubricant and can gum up over time or attract debris, causing malfunctions. Stick to a dedicated gun cleaning solvent and a proper CLP or gun oil instead.
Treat every firearm as if it’s loaded until you’ve personally verified otherwise, and always push cleaning patches and brushes from breech to muzzle, never in reverse. Reversing the direction re-deposits fouling you already removed.
Water alone won’t dissolve carbon or copper fouling, so it isn’t a substitute for a proper solvent. It can be useful for a final rinse in specific cases, but you still need solvent, brushes, and oil to clean and protect the metal correctly.
Pricing depends on the package, from single sessions to group and corporate events, and current rates are listed on the gift card and range packages pages. No experience is required for any option, and every session includes supervised instruction.