Valentine’s Day Special in Tondi Shooting Range
- Mo-Su 10.00 – 20.00
- +372 555 85 416
- sale@laskmine.ee





A night shooting range experience is defined as a structured, supervised shooting session conducted in low-light or dark conditions, requiring specialized gear, safety protocols, and technique adjustments that daytime shooting does not demand. This guide covers everything you need to know before your first session after dark: what to bring, how to prepare, which safety rules apply, and how to shoot accurately when visibility drops. Venues like Tondi Lasketiir in Tallinn offer controlled indoor environments that make night shooting accessible, safe, and genuinely memorable for beginners and experienced shooters alike.
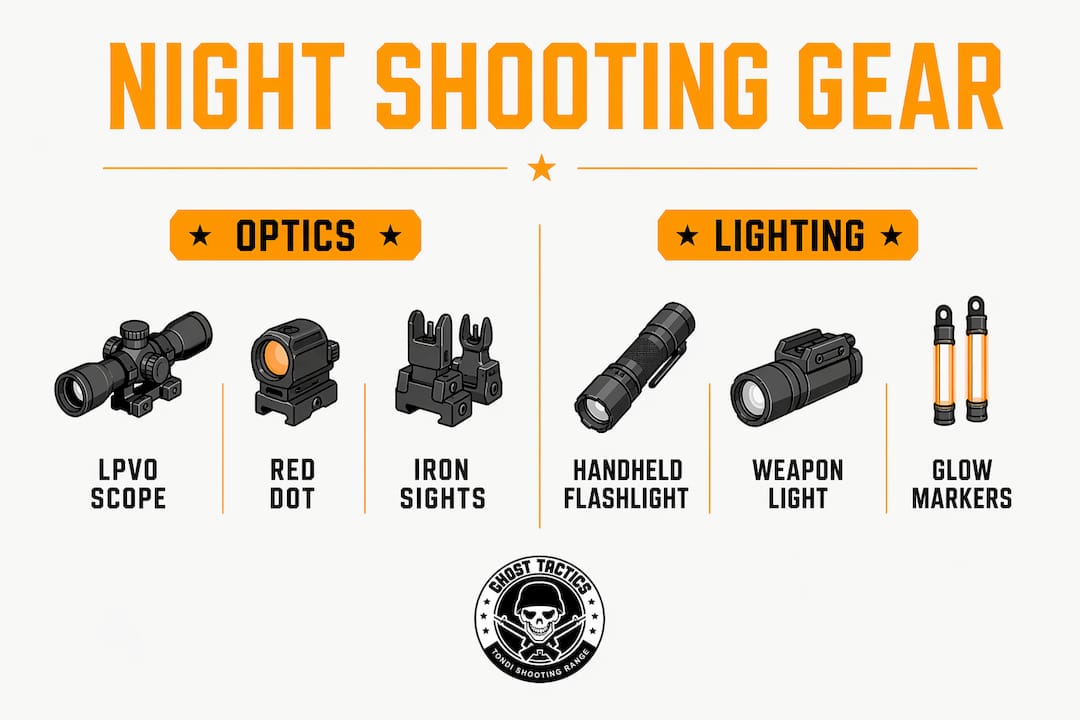
The right gear separates a productive night session from a frustrating or dangerous one. Three categories matter most: optics, lighting, and safety markers.
LPVO scopes with adjustable reticle brightness and a forgiving eye box are the top choice for night shooting. They let you switch magnification quickly and dial reticle illumination to match ambient light. Red dot sights are a strong alternative for shorter ranges because they project a single illuminated point that stays visible even in near-darkness. Both options outperform standard iron sights once light levels fall below comfortable reading levels.
Pro Tip: Pre-set your optic’s eye relief and mount height during daylight. Scope shadow from pupil dilation is the most common complaint among first-time night shooters, and it is entirely preventable with a five-minute adjustment before the sun goes down.
Lighting is not optional at night ranges. A combination of handheld and weapon-mounted lights gives you the most flexibility. Handheld lights handle navigation and target identification without pointing your firearm at anything you have not cleared. Weapon-mounted lights assist at close range when both hands are occupied. Carry a backup for each. Dead batteries are the most common equipment failure at night sessions, so fresh cells before every range visit are non-negotiable.
Lumens alone do not determine flashlight quality. Beam pattern and candela rating matter just as much. A flood beam suits indoor ranges like Tondi Lasketiir, while a throw beam works better for longer outdoor distances. Match your light to your environment before you arrive.
High-visibility markers round out your kit. Glow sticks and reflective tape mark safe zones, firing lines, and no-go areas so every shooter on the range knows exactly where the boundaries are.
| Gear category | Purpose | Key consideration |
|---|---|---|
| LPVO or red dot optic | Target acquisition in low light | Adjustable reticle brightness required |
| Weapon-mounted light | Close-range illumination | Never replaces a handheld light |
| Handheld flashlight | Navigation and target ID | Match beam pattern to environment |
| Glow sticks or reflective tape | Zone marking | Place before darkness sets in |
| Eye and ear protection | Hearing and eye safety | Mandatory at all times on range |
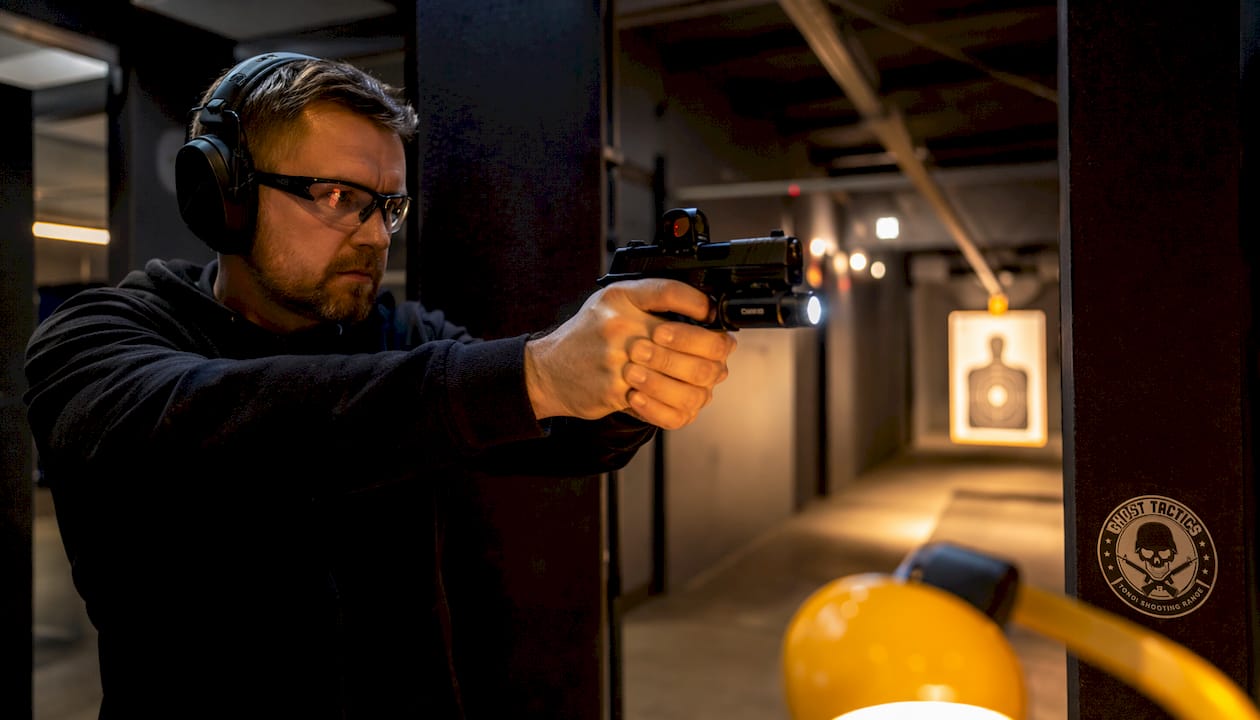
Night shooting demands more than gear. Mental preparation and environmental awareness are the factors that most separate confident shooters from rattled ones after dark.
Dry-fire training in low-light environments builds the muscle memory you need before live rounds enter the picture. Practice your draw, trigger control, and target acquisition in a dark room at home. Your hands learn the mechanics without relying on visual confirmation, which is exactly the skill set night ranges test.
Your pupils dilate in darkness, which changes how you perceive your sight picture. Shooters who have only trained in daylight often find their front sight looks blurry or misaligned at night. This is normal physiology, not a vision problem. Knowing it will happen lets you stay calm and trust your pre-set optic rather than second-guessing your equipment.
Pro Tip: Spend ten minutes in a completely dark room before your range session. Your eyes need time to adjust, and arriving at the range already adapted to low light gives you a real advantage over shooters who walk straight from a bright parking lot.
Pre-setting your scope during daylight is the single most impactful preparation step. Correct eye relief and mount height prevent scope shadow caused by pupil dilation. Shooters who skip this step spend the first half of their session fighting their optic instead of shooting.
Night shooting introduces safety risks that simply do not exist in daytime sessions. Reduced visibility makes muzzle awareness harder, target identification slower, and communication more likely to break down.
Clear verbal commands and agreed signals before the session starts are the single most important safety measure at any group night shoot. Every shooter must know what “range hot,” “range cold,” and “cease fire” sound like and mean before darkness falls. Hand signals that work in daylight become invisible at night, so verbal commands take priority.
Marking firing lines and emergency zones with glow sticks or reflective tape before low-visibility conditions set in prevents the most common night range accidents. Place markers at the firing line, the target line, and any area that is off-limits. Every shooter on the range should confirm they have seen and understood the layout.
“Positive target identification is mandatory before each shot in low-light conditions. Shooting at shadows or unidentified shapes leads to tragic and avoidable mistakes. Confirm your target and what lies beyond it before your finger touches the trigger.”
Muzzle discipline and trigger control are non-negotiable at all times, but the stakes rise at night. Disorientation from low light can cause shooters to lose track of their muzzle direction. Keep the firearm pointed downrange at all times, and never use your weapon-mounted light to identify something you have not already decided is a target.
The Range Safety Officer (RSO) holds full authority during night sessions. Follow every instruction immediately and without debate. At Tondi Lasketiir, trained RSOs supervise all shooting sessions and enforce safety rules that protect every person on the range. You can review the full set of firearm safety rules that apply to range visits before you arrive.
Technique changes at night. The adjustments are not complicated, but skipping them produces poor results and increases risk.
Pro Tip: Weapon-mounted lights should never replace handheld lights. Each serves a distinct function. Reaching for your weapon-mounted light to check a noise means pointing your firearm at an unidentified object. Use the handheld for everything that is not an active shooting engagement.
Reticle brightness adjustment is the most overlooked technique in night shooting. A reticle set too bright washes out your target. A reticle set too dim disappears against a dark background. Find the setting where the reticle is just visible against the darkest part of your target, then leave it there.
Depth perception degrades significantly in low light. Targets that look close may be farther away than you judge. Slow your movement pace and take an extra moment on target identification before each shot. This is not hesitation. It is the correct adaptation to a changed environment.
| Common mistake | What causes it | How to fix it |
|---|---|---|
| Scope shadow | Pupil dilation changing eye box position | Pre-set eye relief in daylight |
| Reticle washout | Brightness set too high for ambient light | Dial down to match background darkness |
| Muzzle drift | Disorientation from low light | Anchor elbows and check muzzle direction before firing |
| Poor target ID | Rushing shots in low visibility | Pause, illuminate, confirm before engaging |
Proper training with both weapon-mounted and handheld lights under realistic conditions is the only way to make these techniques automatic. Reading about them helps. Practicing them under supervision at a range like Tondi Lasketiir is what actually builds the skill. You can also study movement in shooting training to understand how body mechanics affect accuracy when you are navigating in low light.
Tondi Lasketiir in Tallinn offers a controlled indoor environment where beginners and experienced shooters can experience night shooting safely, with expert instruction and all required equipment on site.

Laskmine’s shooting packages at Tondi Lasketiir cover solo visits, group events, bachelor parties, and corporate outings. Every session includes RSO supervision, safety briefings, and access to a range of firearms suited to night practice. Gift cards are available for anyone who wants to give an unforgettable Tallinn experience. If you are visiting Estonia or looking for something genuinely different to do in the city, a night session at Tondi Lasketiir delivers exactly that. Book your session and see what shooting after dark actually feels like in a safe, professional setting.
Night shooting safety and accuracy depend on preparation, the right gear, and strict protocol. Skipping any one of these three areas creates problems that no amount of natural talent fixes.
| Point | Details |
|---|---|
| Pre-set optics in daylight | Adjust eye relief and mount height before dark to prevent scope shadow from pupil dilation. |
| Carry two light sources | Use a handheld light for target ID and a weapon-mounted light for active shooting. Never substitute one for the other. |
| Mark zones before darkness | Place glow sticks and reflective tape on firing lines and no-go areas before low-visibility conditions arrive. |
| Confirm every target | Positive identification before each shot is mandatory. Shadows and shapes are not valid targets. |
| Train in the dark first | Dry-fire practice in low light builds muscle memory that live-fire sessions at night ranges then reinforce. |
A night shooting range experience is a supervised shooting session held in low-light or dark conditions, requiring specialized optics, lighting, and safety protocols beyond standard daytime range rules.
Night shooting is safe for beginners when conducted at a supervised indoor range with a qualified RSO, proper safety briefings, and the right gear. Indoor venues like Tondi Lasketiir in Tallinn are specifically designed for this.
The FBI technique, holding the light out and away from your body at shoulder height, is the most widely taught method. It separates the light source from your center mass and keeps your firearm in a safe position during target identification.
Standard iron sights are difficult to use in low light. An LPVO scope with adjustable reticle brightness or a red dot sight with illumination settings gives you a clear sight picture when ambient light drops.
Spend time in a dark room practicing your draw and trigger control before the session. Pre-set your optic in daylight, pack fresh batteries, and arrive early enough to walk the range layout before full darkness sets in.